Take 2
I got tired of the Chinese engine, the yearly trouble to get the engine stencilled separately, and wanted to have in registered in my name. And if I fix things, I fix them properly.
The Dax
I bought the Dax mostly for sentimental reasons using the excuse to have a bike for the kids to learn riding on. In reality, we always had a Dax around, during my twenties my brother had one and we took it to Southern France. Later it was often accompanying us on camping trips. So a Dax sort of belongs to the family.
Then there was this advert in the internet:
“Honda Dax
Fully restored
Great running condition engine
Asking price: P50,000.00 NEGOTIABLE
Bike is in Sta. Rosa, Laguna or Muntinlupa”
According to the seller it was recently restored, and during my test drive it was working reasonably OK, so I bought it.
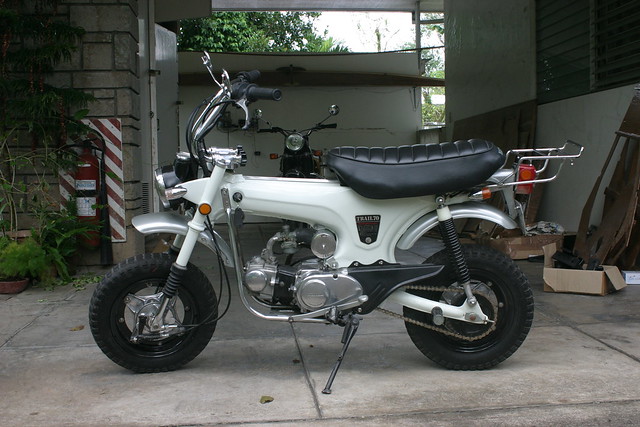
Honda Dax with original Honda Engine with 72 ccm.
However, after bringing it home, the engine started reacting really funny when it got hot. It lost power and also produced a lot of white smoke, usually a sign of burning oil. That is normally the case when piston rings or the piston are worn. So I thought, if I spent time on fixing this it needs to be worth it, so let’s not just fix it, but also improve the performance a bit. So I bought a tuning kit consisting of cylinder and piston for 85ccm, and a cylinder head with racing camshaft. Since I was busy earning money with my real work I brought the whole thing to my mechanic in Manila. He fitted the kit and returned the little Honda to me.
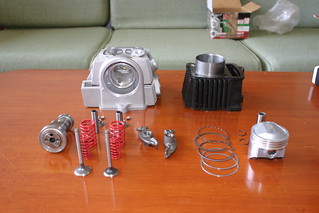 |
Tuning kit for 85 ccm “Kompletter, montagefertiger Obermotor, |
The engine did work, but unfortunately the symptoms remained. Cleaning the carburettor did not help. I was still busy with work so I just bought a brand new Chinese engine for around US$ 250 during my home leave in Germany. It only had 48ccm, but 4 gears, a manual clutch and a 12V electrical system with CDI ignition and a stronger light coil for proper 12V lighting. I fitted the engine and to maximise the benefits from the opportunity I also ripped out the electrics, which were hopelessly screwed up by the previous owners. I then re-wired the little bike from scratch.
I then went to my insurance agent with the request to change the engine number in the papers, just to find out that that is not easily possible. All sorts of documents have to be produced and the potential for success was not clear, so I just had the old engine stencilled during the registration process, that needs to be repeated every year.
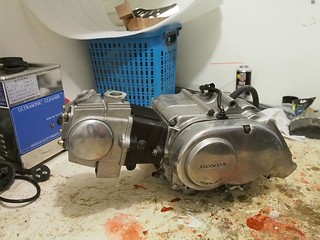
In April 2016 the Chinese engine (Jincheng), only having done a few hundred kilometers, started producing a puddle of oil when ever I parked the bike. On a quiet Saturday morning in April 2016 I therefore finally made the decision to take the original HONDA engine apart and re-build it from scratch to avoid this cumbersome and somewhat illegal registration process, to get back some of the power of the bigger engine, and to get rid of the Chinese Scheißschrott that unfortunately had lived up to its poor reputation.
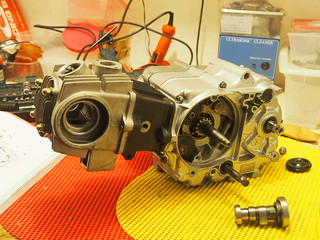
Disassembling the engine
So I took the engine apart and found the usual, ruined screws from DIY (destroy it yourself) action of previous owners and probably also from tinkering done by incompetent mechanics, a few worn parts, but no major problems. Nothing really that explained the power loss experienced when the engine gets hot. So maybe it was fuel system, ignition or the rotten electrical system. We’ll find out after restoring the engine.

Assessment
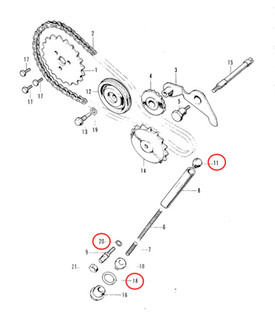
I went through the original HONDA spare part catalogue, which is available online, and marked all the parts I like to replace.
Ordering parts and repairs of some damages
Many of the needed parts Loy, who is doing motorcycle restorations and has done some excellent paint jobs for my BMW, had on stock so I could gat all gaskets, oil leaks, bearings and some other parts easily her within a few days. I also sent some parts for repair to Loy, in particular the engine housing with broken off thread and the seat for a new, European style seat cushion and cover.
If I take an engine apart I don’t want to do it again so I like to change all parts that potentially wearing e.g. the oil pump. So I went shopping on the internet. So I ended up buying from my good old favourite Dutch shop that stocks up spare parts for the big Japanese four, CMSNL in the Netherlands. They are great and have almost every genuine spare part of Honda, Yamaha, Suzuki or Kawasaki. They also have online spare part catalogs. I used to buy parts for my Yamaha TTR250 there. So they gave me access to all the genuine parts I need.
In the process I also found another interesting shop, Motorkit in Belgium, where I stumbled across some interesting upgrade kits. These include:
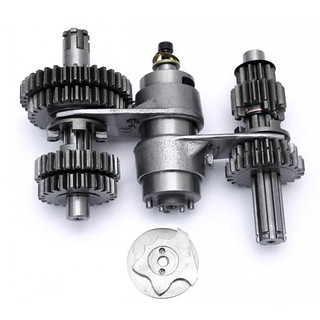
1.) A four gear gearbox from AHP which should give more acceleration and higher top speed as the gear ratios below suggest
2.) A CDI ignition kit
So I ordered those too. They are all reasonably priced, so I will get much better performance on a shoestring budget.
I placed the orders on May 7, 2016 and since both companies don’t ship to the Philippines I had them shipped to Germany and they will be forwarded to me from there. I also ordered all the worn parts I could not get in the Philippines at CMSNL.
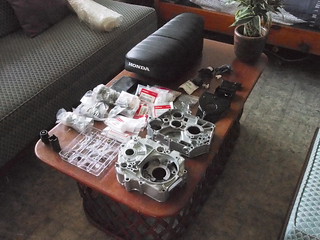
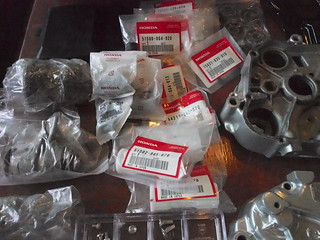
Parts arrived in several batches over three months.
In the meantime had the frame parts re-painted.
Re-buidling the engine
It took a Saturday to assemble the engine.
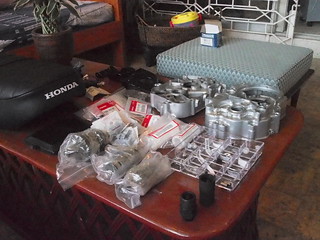
Most of the parts purchased are engine parts.
The crankshaft housing
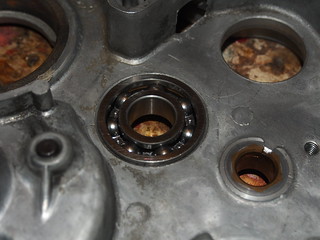 | 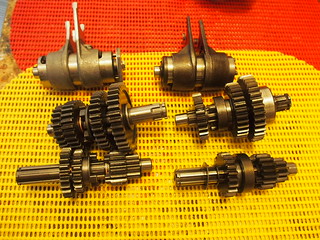 |
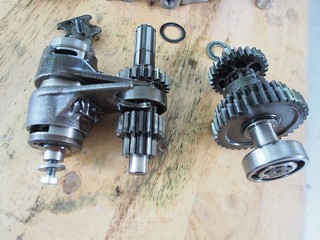
| All new, original Japanese bearings | The new four gear transmission (left) compared to the old one (right) |
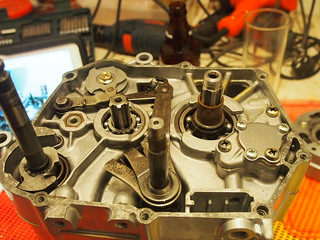
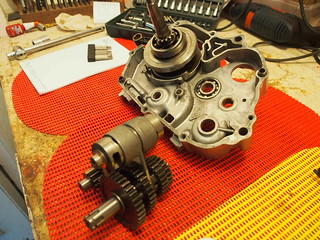 | 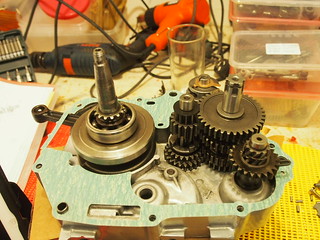 |
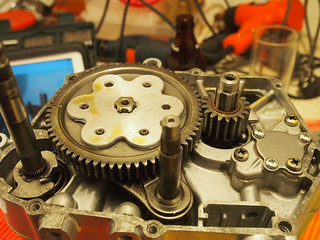
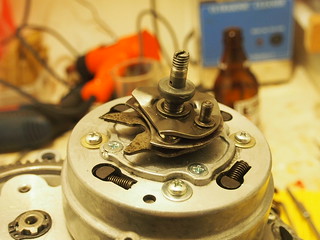
| Crankshaft mounted, gear assembled | Gear placed in position, ready for closing the engine block |
 |  |
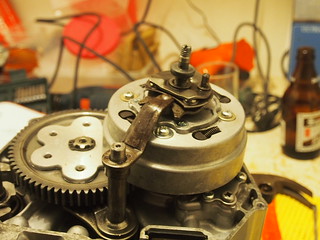
| Crankshaft housing closed | Turn over to the other side to mount gear shifting mechanism for turning gear control cylinder (top) |
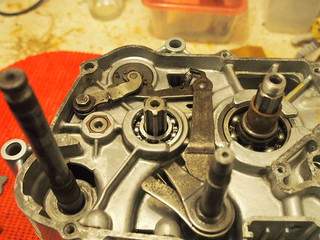 |  |
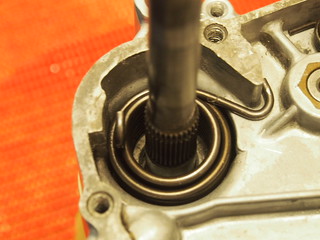
| Install gear shift lever shaft with shifting mechanism | Detailled view of gear lever shaft end |
 | 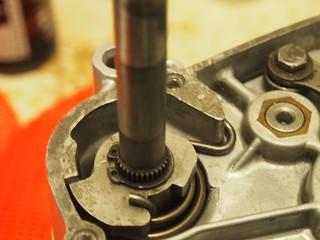 |
| Installing the kick starter shaft with spring | Completing kick starter assembly |
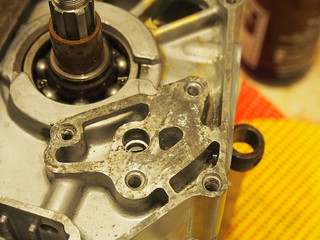 | 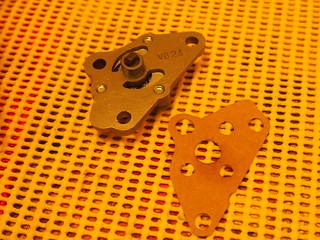 |
| Next is the oil pump | Fully assembled replacement pump with gasket |
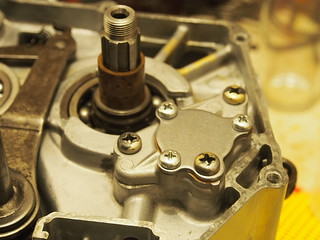 |  |
| Oil pump installed | Ready for mounting the primary drive and clutch |
 |  |
| Installing large gear wheel.. | .. and the small gear wheel. |
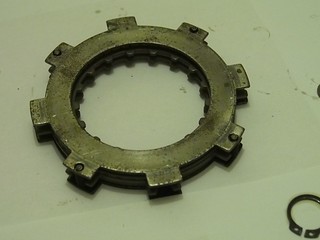
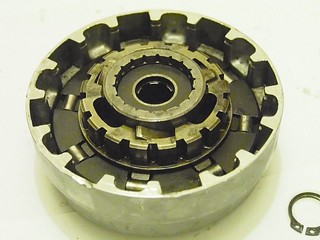
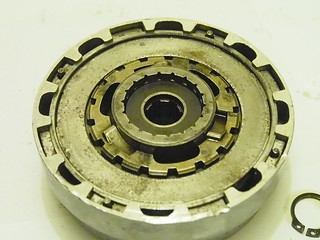
Before completing the job we first need to re-build the clutch
The clutch
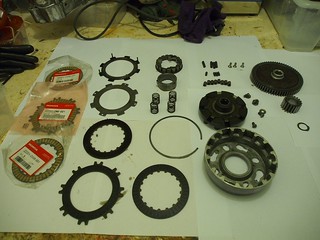 | 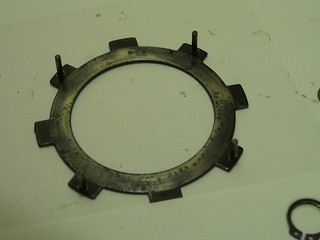 |
| All parts of the clutch, including new clutch linings | Dry run with the new clutch linings, the old ones where wrong types, just want to make sure the new ones fit. Fist friction disc.. |
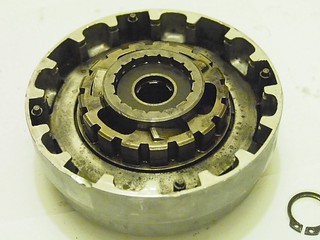
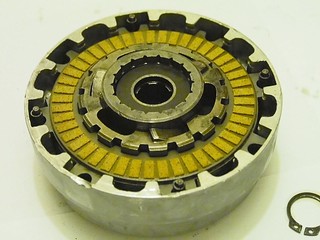
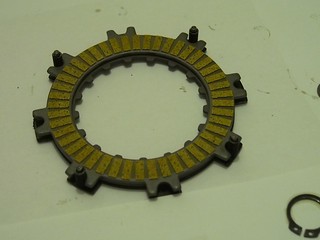 |  |
| .. alternate clutch lining discs with friction discs.. | .. fits. this is how it should look like. |
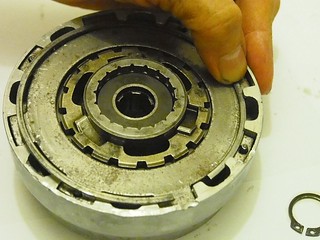
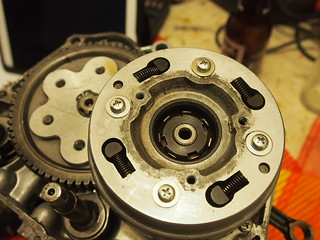
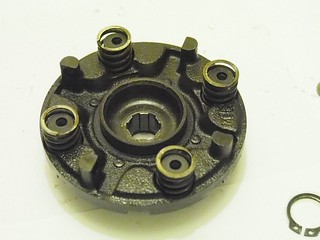 |  |
| Start assembling the clutch. Sart with the drive plate, fit the springs.. | .. fit it into the outer clutch.. |
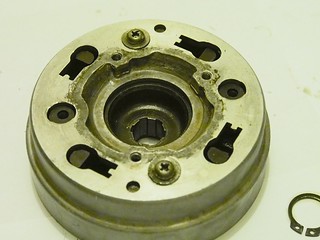
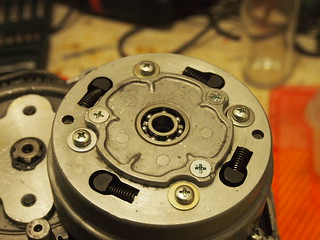
 |  |
| .. fit the 8 rollers into the back of the drive plate.. | .. fit outer gear and clutch center.. |
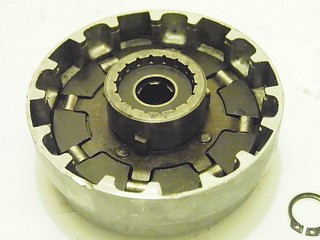
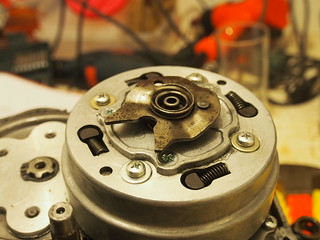
 |  |
| .. then put base friction plate.. | .. and clutch linings, friction plates etc… |
 |  |
| .. secure the clutch with the set ring.. | .. finished. Ready to mount in the engine. |
Completing the crankshaft housing
 |  |
| Monting the clutch. Using the rigth tool, which only costs a few dollars and saves the nut. | Closing it up |
 |  |
| Clutch disengaging mechanism.. | .. and provision for clutch adjustment. |
 |  |
| And finally the lever from the gear shaft. | Time to close the engine block by adding the clutch cover |
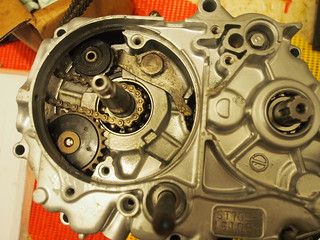 | 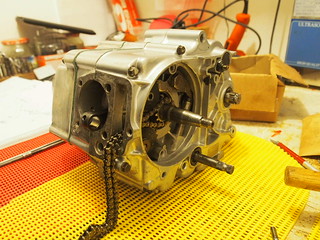 |
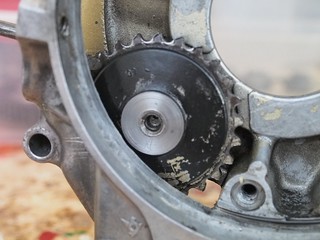
| Turn the engine block around and mount timing chain and chain tensioner | |
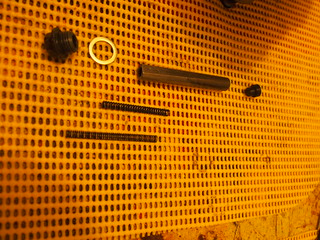 |  |
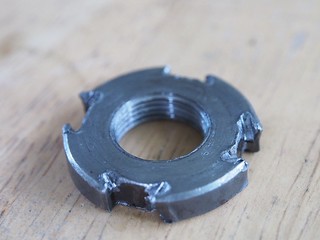
| Parts of timing chain tensioner | Mount the stud bolts |
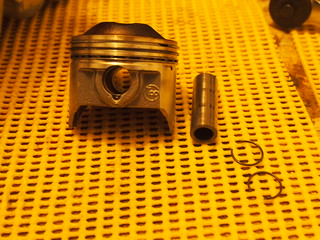 | 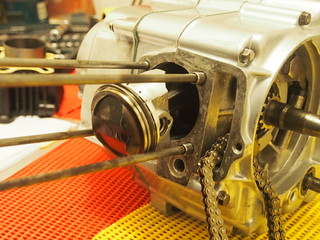 |
| Oversized piston wiht 88 ccm | Installed piston |
 |  |
| Fit cylinder and cylinder head, then mount camshaft make sure that the timing is right | Mounted alternator and alternator cover Engine ready for testing. Still waiting for the carburator |
Testing
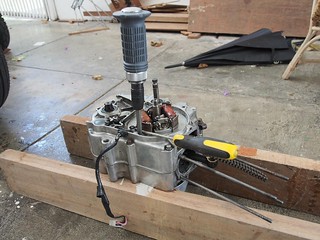
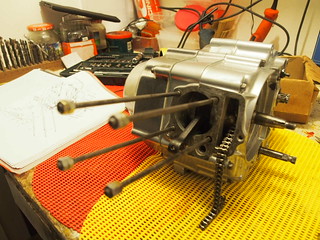
I strapped the completed engine onto a beer crate, added carburator and ignition coil, filled up oil and connected it to an improvised fuel tank to test it before fitting it into the Dax.
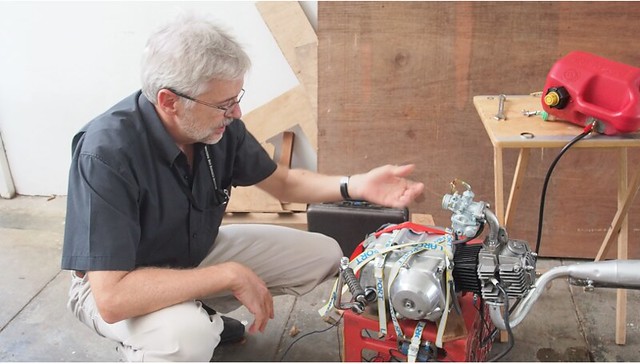
It worked:-)
Cutlery – Rebuilding the Fork
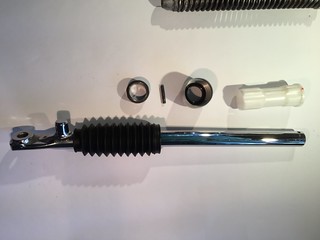
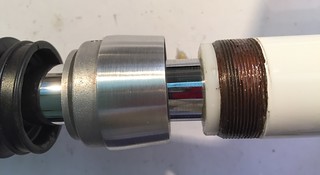
The fork was very worn out and some none stock parts were used on it. So quite a lot of the odered parts went into restoring it to original condition. The two lower tubes had some rust, so I had chrome and rust removed at Chrome Dazzler and a new chrome plating done.
| Hier Fork 1 | 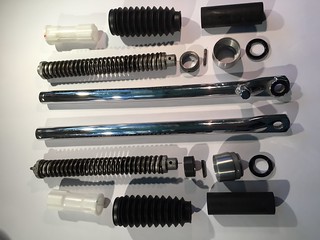 |
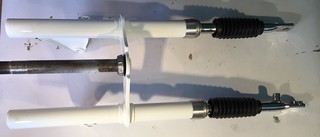
| Starting point. | All parts of the lower fork – shock absorber .. |
 | 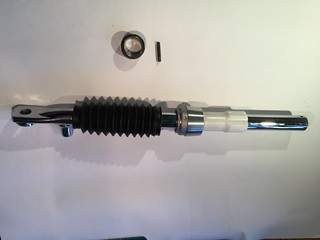 |
| ..starting the assembly.. | ..ready to be fitted to the spring. |
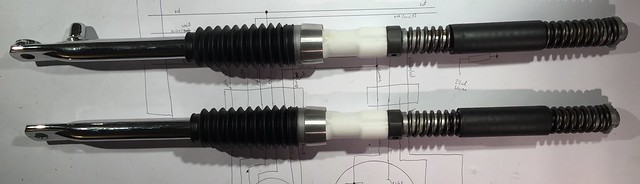
 |  |
 |  |
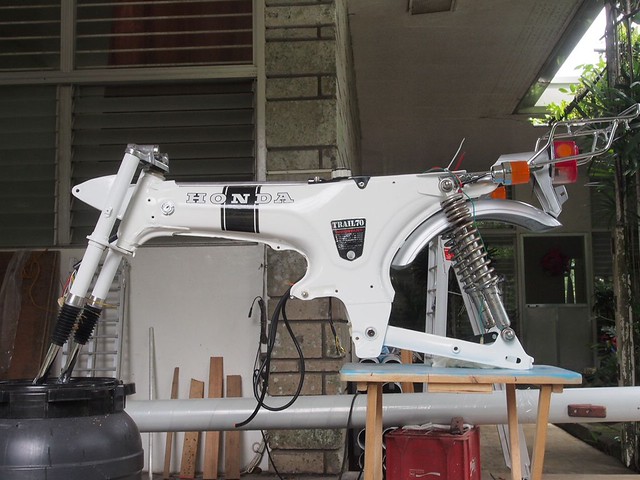
Re-birth of the Phoenix
November 12, 2016
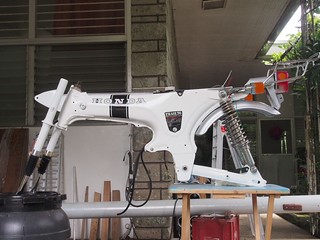
So finally I got all the parts required and Mavic had picked up the frame and other parts from Ropali Classic in Manila. The restoration could begin.
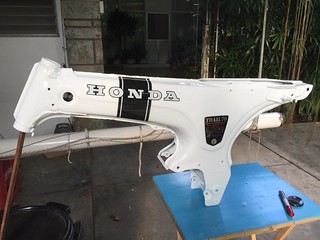 | First thing to do was to fit the original decals. The did cost a small fortune but since I want the Dax to be as original as possible, it was worth it. |
Oops, Trouble – Sunday, November 13
All this excitement about the new look, then by chance I decided to check for the serial number. In the Philippines you need to register your bike every year. In the process the serial number needs to bet “stenciled” to proof that it is the right bike. The problem with re-painted bikes is that the serial number is often covered under deep layers of primer and paint and can’t be stenciled anymore. The guy who does the stenceling at my insurance office in Los Banos therefore always brings a big knife, to scratch off the paint in case he can not find the serial number. The last thing you want is someone work with a big knife on your newly restored bike.
So I frantically looked for the serial number, but could not find it. I even forgot where it was. Panic. Do I need to remove the paint? Maybe re-paint the whole frame? Then I remembered that I had taken pictures of the motor and the frame numbers some time ago to discuss with a Dutch fellow where the Honda was made. A quick look in IPhoto, and indeed, there was a picture with the frame number. Using that picture I could locate where the number most likely was hidden under the paint, I felt like an archeologist. Then I market that most likely area with masking tape. Then I used my airbrush cutting knifes to neatly cut around the area and then remove the paint in that rectangle. This felt like being an airbrush artist again. I came pretty close, I just had to expand the paint-stripped area a little because I had missed the first character of the number. A lot of scratching, a bit of paint stripper, and there ist was, the serial number in all its scratched beauty. I am going to cover it with a thin layer of paint, to make sure the little Honda will never have to experience the big knife.
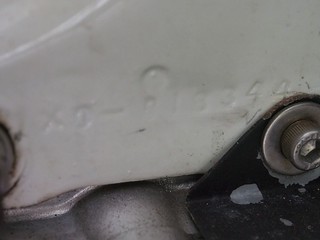 | 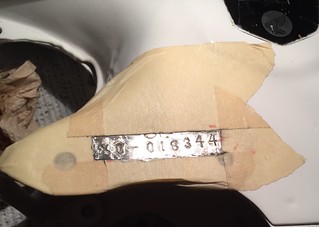 |
| Location of the frame number before re-painting.. | .. there it is in all its beauty. |
Sunday November 20
I had a little bit of time so I had a go at some small things. Fitted the rear swing, started restoring the main cable harness. I bought an original ignition lock which has the light switch built into the lock, the old lock only turned the ignition on and off and the light switch was located at the handle bar as a modification. I also need to convert the electrical system back from 12 V used with the Chinese engine to the 6V original. So I had to reverse the modifications made to the cable harness by previous owners. After some search I found the wiring diagram for an ST70 Export version on the internet, which will serve as the starting point for the new electric system.
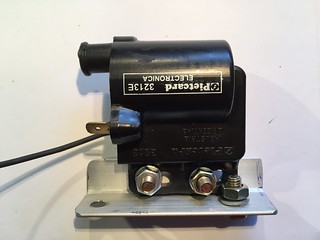
In the old 6V ignition coil the high voltage cable got detached – unfortunately unrepairable. So I bought a new 6V coil, but since could not find a HONDA part, the new one is made in Argentinia and has a different shape, the screw holes of the coil don’t fit the holes in frame. So I had to fabricate an aluminium angle profile to be able to fit it into location.
 | Hier 2 |
| The new ignition coil with “apdaptor” for mounting at the frame |
Sunday, December 12, 2016
Made some progress again. Got the fork re-painted and assembled the whole fork with all the new parts. Mounted the calbe harness and tested it, then the tank, the ignitionlock, all electrical components, and the battery holder. The back fender, lamp holder and back blinkers and back light.
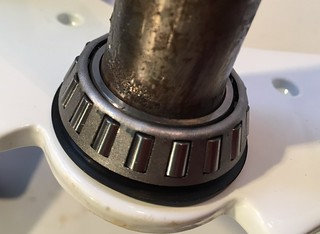 |  |
| Tapered roller bearings instead of the original ball bearings | Fork mounted |
 |  |
| Always using the right tools.. | This was as good as it gets with polishing |
Progress at the end of the day